Container management
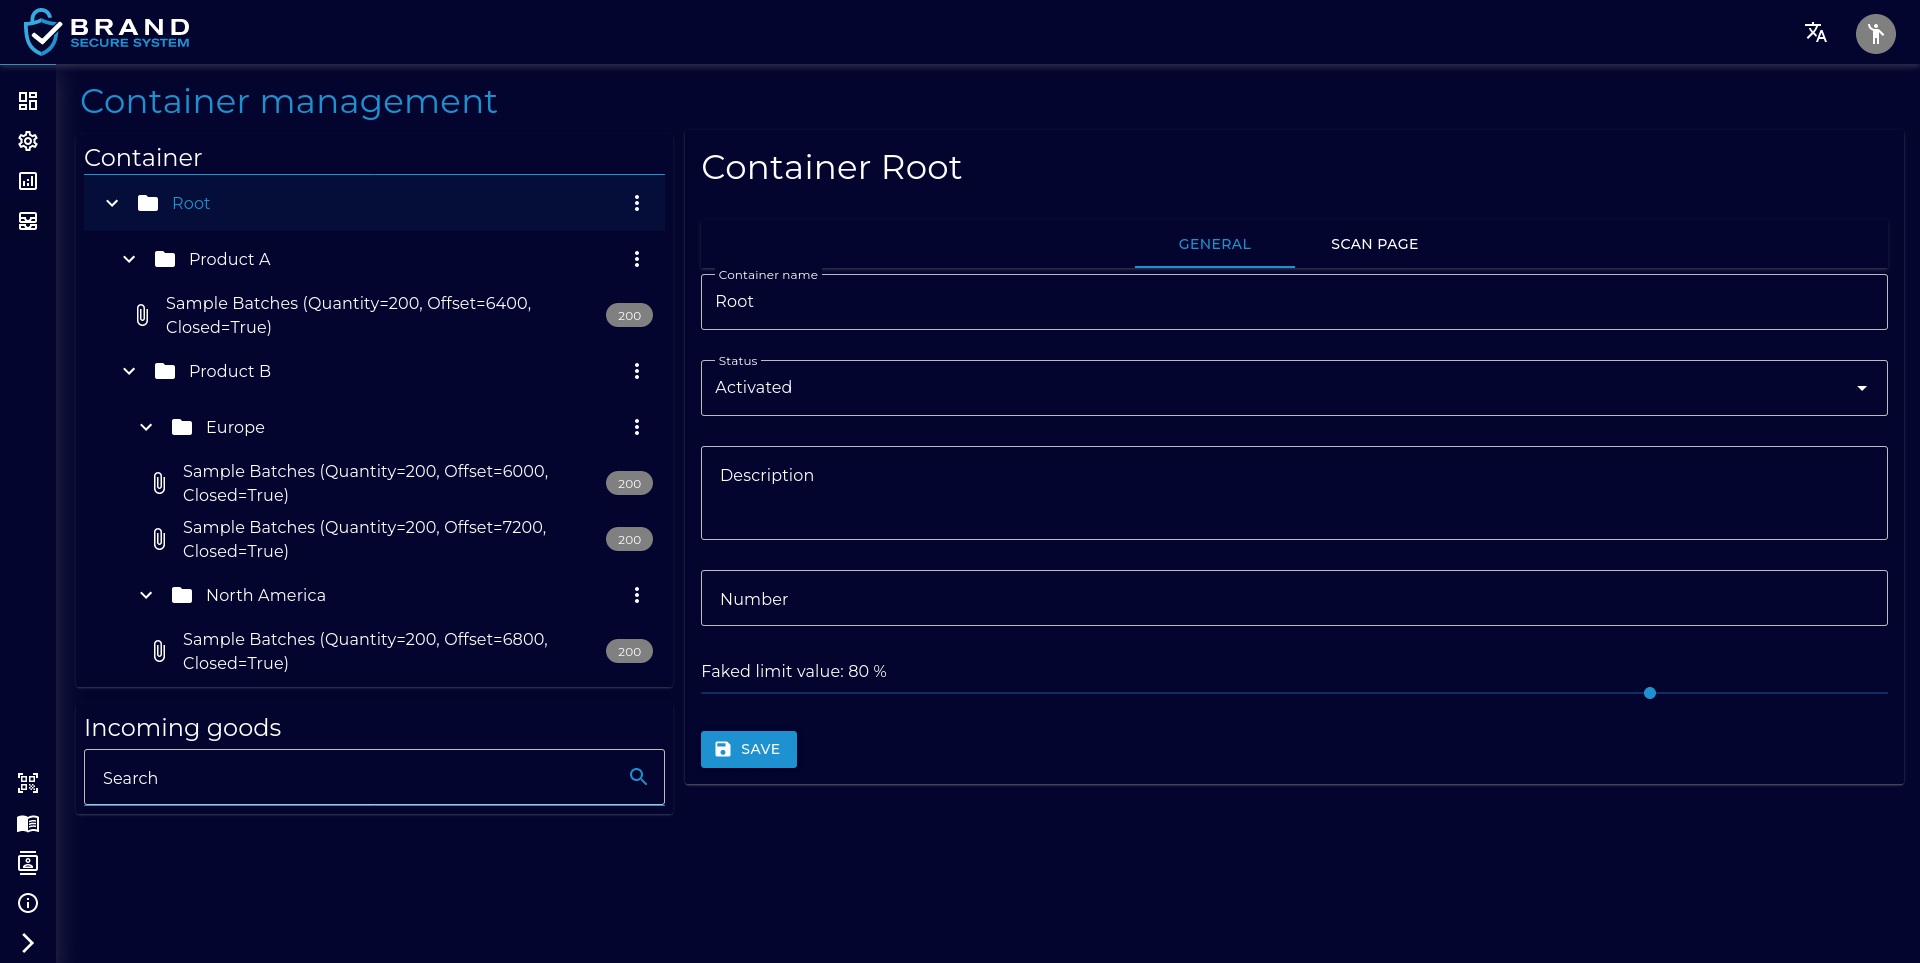
Clicking a container provides additional information about the container in question. The information includes the name, description and number. Here, a user can also enter a limit value (in percent) after which a scan is classified as being “fake”. With the status, it is possible to configure if the codes included in this container or a sub-container are disabled. This changes the result of a scan analysis.

The container structure or the assignment of a batch to a container can be adjusted by drag and drop. Simply dragging allows the structure to be modified right up to the topmost container. The changes are automatically accepted and a scan before and after the change could display this difference directly. It is also possible to drag new batches from the shopping basket (not assigned) into the container structure and thus assign them.
Adding & removing containers
Before a container can be added, a superordinate container must be opened up. This is the case when an arrow pointing to the right can be seen in front of the container name. Pressing this button creates a downward-pointing arrow.
There are now three vertical dots after the container name. Pressing this button opens up a menu containing a plus symbol. This in turn opens up a dialog where the name of the new container can be entered.
If a container has no sub-container and its menu is opened up, the menu will also include a trash can symbol. It can be used to remove any containers that are no longer needed.
Warning: This irreversibly removes all of the created scan pages belonging to this container.
Batch management
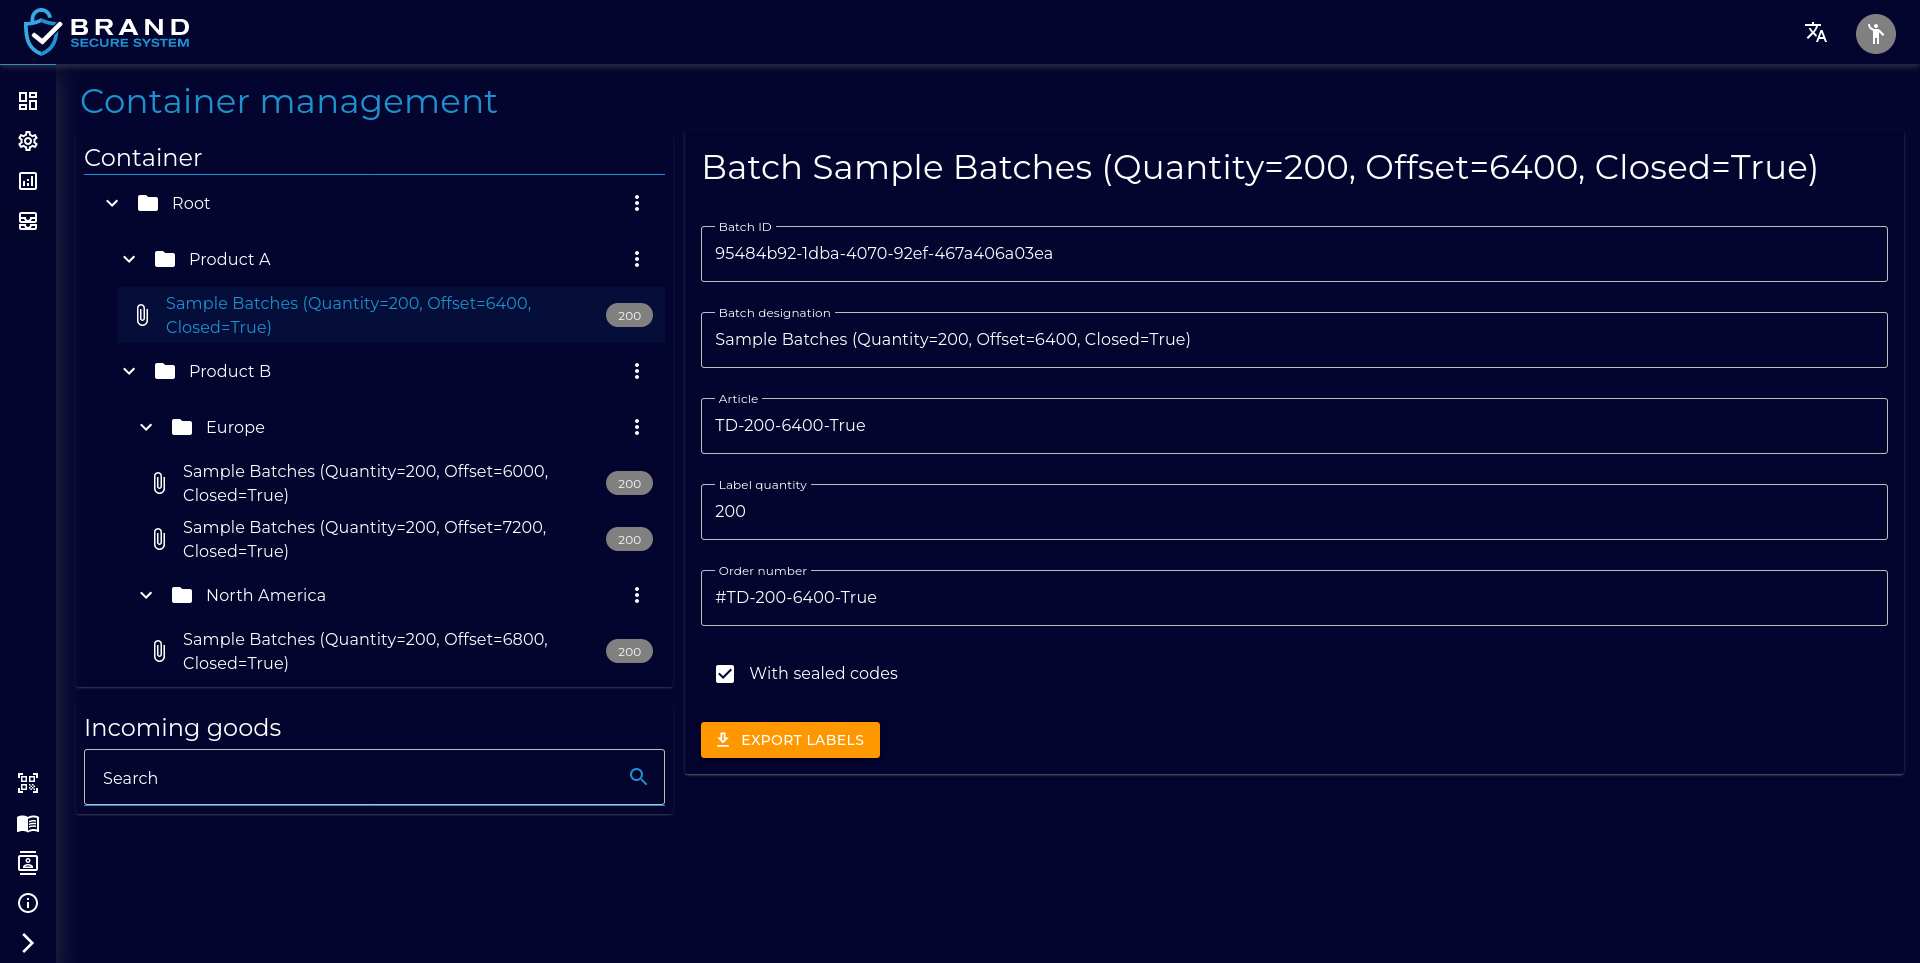
Clicking a batch provides additional, unchangeable information about the batch in question. It contains the designation, the number of labels, as well as the article and order number. This view also shows if sealed (closed) codes are included in the batch in question.

Batches cannot be generated, added or removed independently.